
Deep Learning on photorealistic synthetic data
Let me preface this by encouraging you to keep reading regardless of you level of expertise in the field. I think the approach presented here is so general yet intuitive that it can benefit novices and experts alike while being supremely accessible.
Introduction
So, what is this and why is it exciting? You might be aware of the growing level of realism of computer generated contend in both the games and film industry, to the point where it’s sometimes indistinguishable from the real world. If this is completely new to you, I would encourage you to give it a quick search online. You will be amazed by how much of modern movies is actually not real but computer generated to the point where only the actors faces remain (if at all).
Now, if you are reading this, chances are you are neither a cinematographer nor game designer, so why should you care? Here is why I do: At work, I’m partly responsible for making our robots perceive the world. This is mostly done through images from cameras and we use neural networks to extract meaning from them. But neural networks need to be trained and they are not exactly quick learners. This means you need to provide tons of examples of what you want the network to learn before it can do anything useful. The most common tasks a robotic perception system needs to solve are object detection and classification but sometimes we might also need segmentation and pose estimation.

How do we get training data for these tasks? Well, depending at where you work and what your budget looks like you might enlist friends, coworkers, students or paid workers online to draw those gorgeous bounding boxes around each object of interest in each image and additionally label them with a class name. For segmentation this becomes a truly daunting task and for pose estimation, you can’t even do it by any normal means1.
Apart from fatiguing fellow human beings by forcing them to do such boring work, they also get tired and make mistakes resulting in wrong class labels, too large or small bounding boxes and forgotten objects. You probably see where this is going: What if we could automate this task by generating training data with pixel-perfect annotations in huge quantities? Let’s explore the potential and accompanying difficulties of this idea through a running example: The cup.
By the end of this article, we want to be able to detect the occurrence and position of this cup in real photographs (and maybe even do segmentation and pose estimation) without hand-annotating even a single training datum.
Making some data
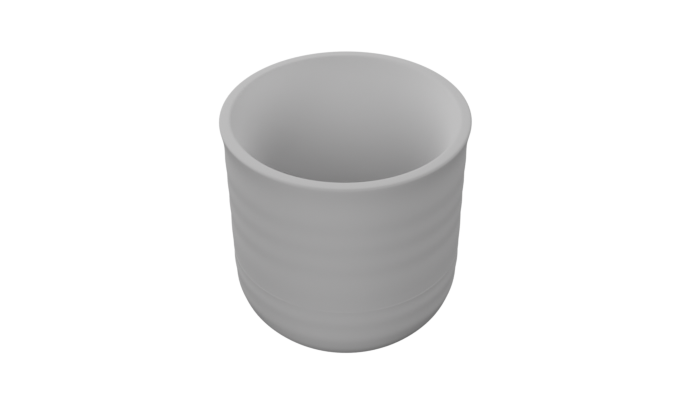
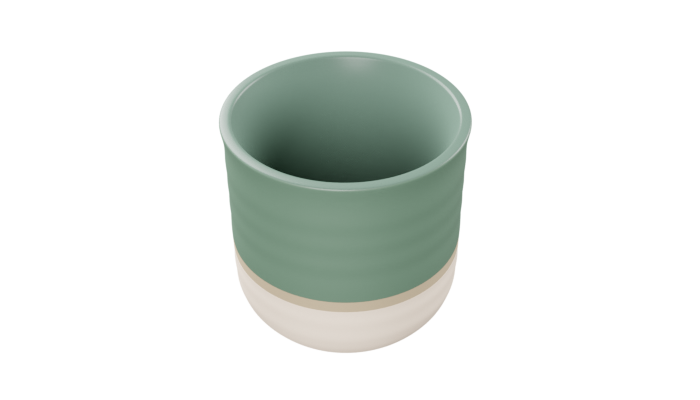
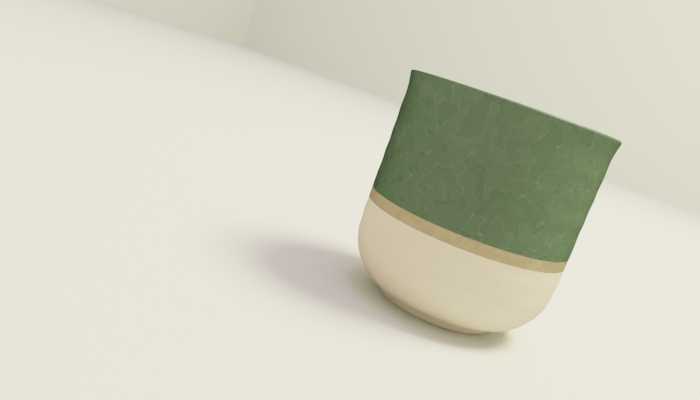
Before we can make synthetic training data, we first need to understand what it is. It all starts with a 3D model of the object(s) we want to work with. There is a lot of great 3D modeling software out there but we will focus on Blender because it is free, open source, cross-platform and, to be honest, simply awesome.
I made this cup model you see above in an afternoon (so there is still some work involved) but I’m a complete novice to 3D modeling2 and an expert could probably make such a simple model in a few minutes. More complex objects might take more time, but there are already a lot of great 3D models out there you can download for free and even if you start from scratch, you only need to do it once and can reuse it for all kinds of projects and learning tasks.
We could now snap an artificial image (i.e. a render) of the cup model to get our first datapoint! But wait, you might think, where are the promised automatic annotations like bounding boxes and segmentation masks? For now, simply trust the rendering software (Blender) to know where it places everything, and we will come back to this in a bit.

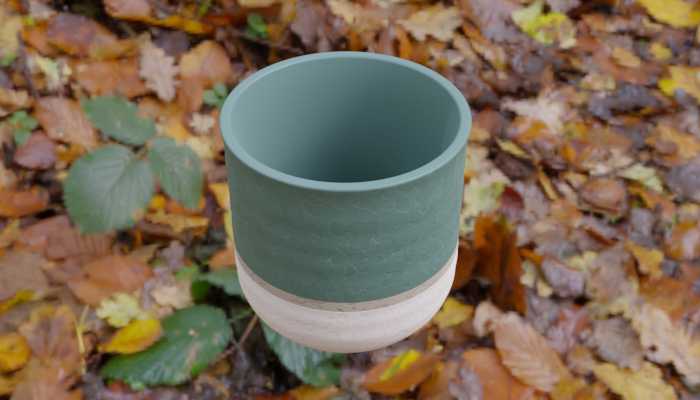
First, let’s try to get a few more datapoints. Simply rendering the same image a hundred times won’t provide any new information to our neural network so we need to introduce some variety. We could rotate the cup to render it from all sides or rotate the (artificial) camera around it, which, in this setup, would be equivalent. Still, a white background with the object in the center isn’t exactly realistic and thus won’t generalize to real world applications. The most common way to narrow the gap between simulation and the real world (the sim2real gap) is to render objects in front of randomly selected photographs.
While simple, the result is unconvincing due to differences in lighting: the object will be rendered with artificially placed lights which won’t match the direction, intensity and color of the light from the scene captured in the photograph. A slightly better approach is to use high dynamic range images (HDRIs) which store, next to color, additional brightness information in every pixel and cover 360 degrees of viewing angle. Rendering an object inside this sphere allows the utilization of the lights color, direction and intensity for realistic illumination and reflections.


So far, everything we have done can be achieved through Blender alone. Through the introduction of randomized camera views, things started to get tedious though. While you could add a camera path around the object and invoke renderings at discrete positions on this path to obtain multiple views of you object, the result wouldn’t be random. Adding further randomizations like lighting, backgrounds and colors requires manual interaction with the program for each setting which doesn’t scale to 10.000 images. But why do we even need randomness?
It’s all about generalization: You want your trained model to work under diverse conditions like different viewpoints, varying lighting conditions and (usually) slight variations of object properties like size or color. The best known way so far to achieve this is to present the algorithm with this kind of variability during training. In the real world, this can be challenging, leading to overfitting where the algorithms start to memorize correct answers or start to fit noise rather than the intended signal. Imagine for example an algorithm trained to classify the weather on images. If all rainy days in the training data include people with umbrellas, the algorithm could learn to classify images based on the absence or presence of umbrellas rather than sun or clouds in the sky or dry or wet streets. When deployed, such an algorithm would fail miserably on images with people using umbrellas against the sun or on those depicting bad weather but without any human being.
Now, how can we solve this problem in our synthetic data generation pipeline? Well, you probably guessed it, we write a program to automize everything we’ve done so far and much more.
BlenderProc
Luckily, we don’t even have to actually write the program ourselves. Enter BlenderProc, a procedural Blender pipeline for photorealistic training image generation. In my short introduction to Blender, I’ve missed one very important trick it has up its sleeves: A complete Python Application Programming Interface (API) allowing us to achieve everything that can be done by manually interacting with the user interface but through lines of code instead of mouse and keyboard input.
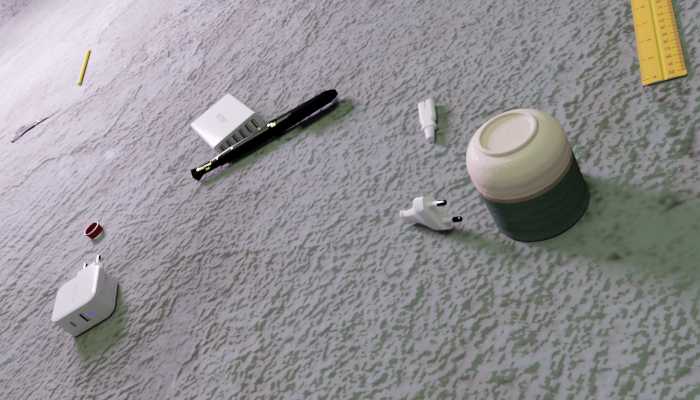
This is what BlenderProc builds on to provide functions to place objects, lights, textures and a camera into virtual scene and then uses Blenders physically-based path tracer to make photorealistic renders of it. All of these steps can be repeated as many times as required, randomly sampling object, light and camera positions and orientations, textures, light strength and color and much more. Have a look at the example below. By randomly placing the cup inside a cube consisting of four wall planes, a floor and a ceiling, adding a randomly placed light with varying strength and color and then rendering it from multiple random viewpoints we already get a more physically correct representation with proper lighting, reflections and shadows compared to random background photos.


As you can see, the color of the cup seems to change even though we haven’t randomized it (yet) which underlines the importance of correct handling of light if we want to generalize to the real world later. One glaring shortcoming of our current setup is the static orientation of the cup. While it’s position is randomized, it stays upright in all renders. This is problematic if we want to detect cups in the real world which can also lie on their side or be place upside down. While we could introduce random rotations into the mix, the result wouldn’t be realistic, as objects only have a limit number of physically plausible poses3 due to the influence of gravity.
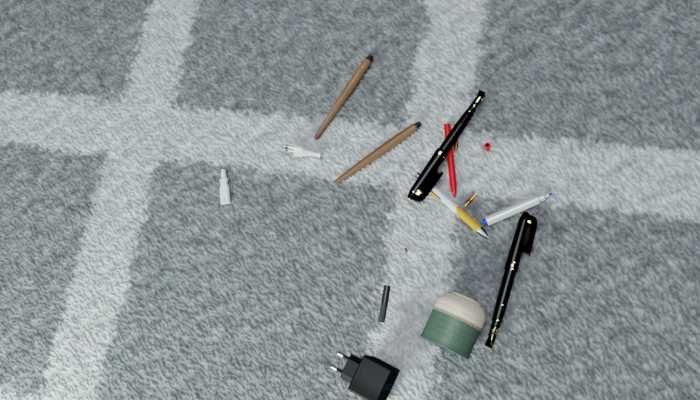
Here we can make use of another neat feature from Blender: physics simulation. Instead of placing the object directly on the floor, we can first rotate it randomly and then let if fall into the scene and simulate it falling, bouncing and rolling around until it stops moving (or at least approximately so). The result can be seen below.
Here is a little entertaining anecdote: Do you see how the cup stands tilted to one side in the fourth picture? I didn’t know it could do that but when I saw the picture and tried it, sure enough, it worked. Physics simulation is just great.


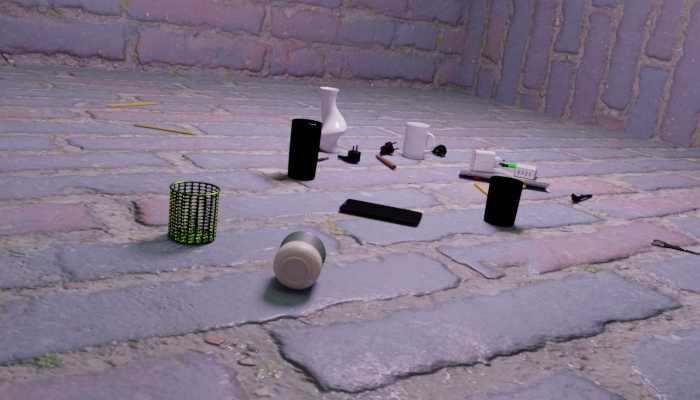
Another problem you might have noticed is the white background. Detecting objects under these conditions is too easy and won’t generalize to the real world with its infinitude of possible backgrounds. The solution is to download a large quantity of high quality Physics Based Rendering (PBR) textures and randomly assign them to the white surfaces. A great choice are free and open source textures from ambientCG for which BlenderProc provides a download script and loader function. PBR textures increase realism by incorporating not only color but also displacement, roughness and surface normal information which the renderer can use to make metal or polished wood shine and cobblestone seemingly protrude into the scene.
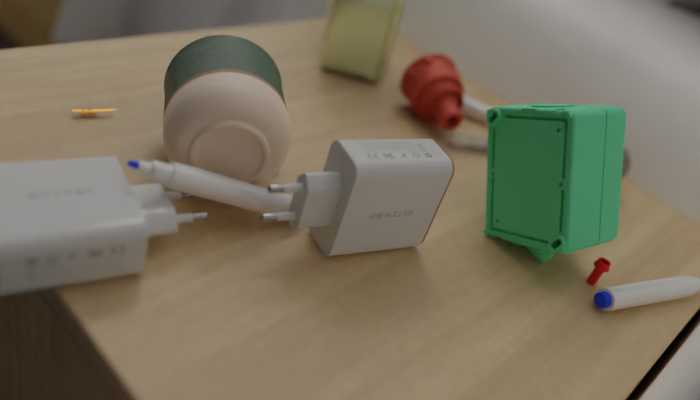
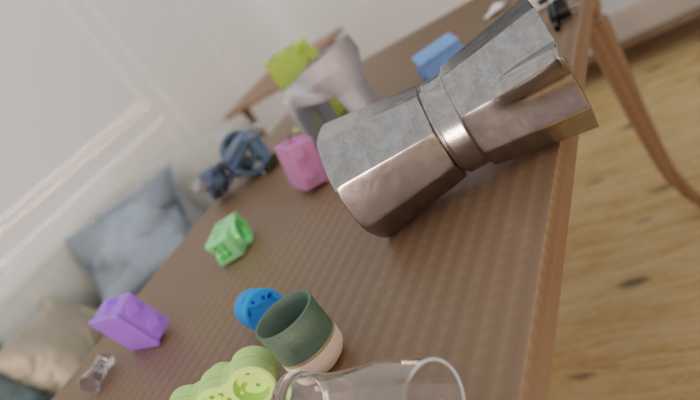
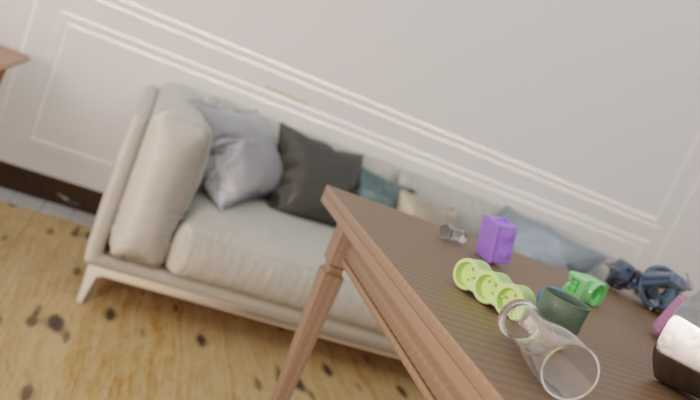
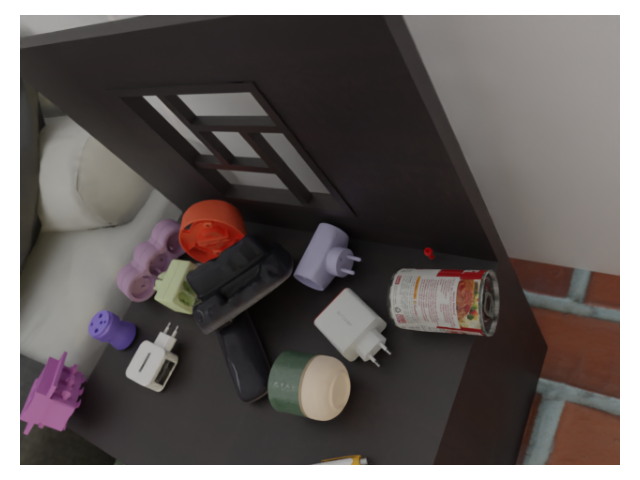
Next, we introduce clutter. Due to shadows and sudden changes in color and other material properties between background and objects, a single object is still too easily found in our scenes. By throwing other randomly selected objects, e.g. from BlenderKit, into it we increase the difficulty through the addition of negative examples (this is not a cup!) and occlusions (objects in front of the cup).

Finally, we can replace our simplistic cube by an actual room with furniture, lamps and windows through which realistic light from HDR images can fall. One possibility is the 3D-FRONT dataset offering thousands of rooms with high quality 3D models of furniture and textures. Again, BlenderProc provides a loader function loading and placing all objects from a selected scene.
You don’t even need to use the actual Python functionality provided by BlenderProc. Instead, we can write a data generation pipeline config, which in our case looks something like this4:
- Load a random 3D-FRONT room.
- Load some random wood, marble and brick PBR textures and replace some of the original ones.
- Select an object from the room to place the cup on. Each group of objects like beds or chairs has an ID so we first randomly select a plausible group and then a random instance within that group.
- Load the cup model and the models used as clutter.
- Randomly modify the objects material properties like roughness and color.
- Sample a random pose per object above the selected furniture.
- Run the physics simulation.
- Randomly place lights with random brightness and color.
- Place cameras at random position and orientation looking at the cup. Slightly nudge the camera so the cup is always visible but not exactly in the middle of the frame.
- Run the renderer.
With this you will get results like the ones seen below.
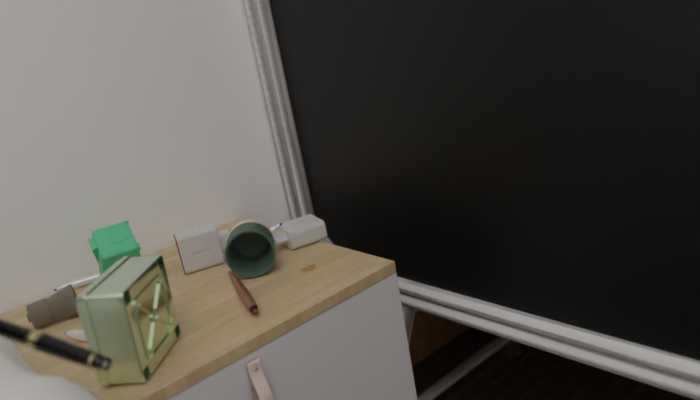

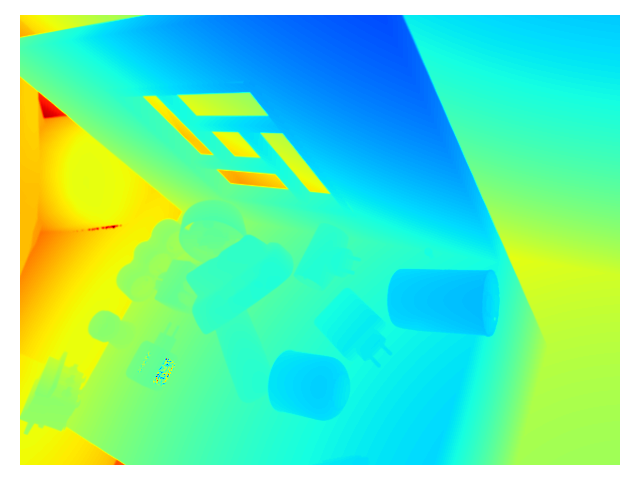
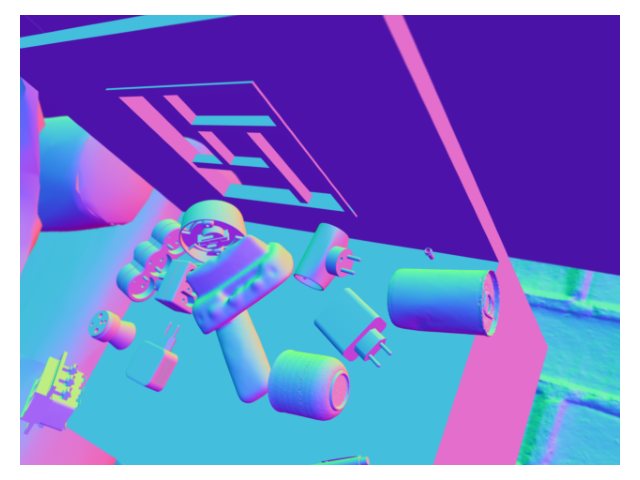
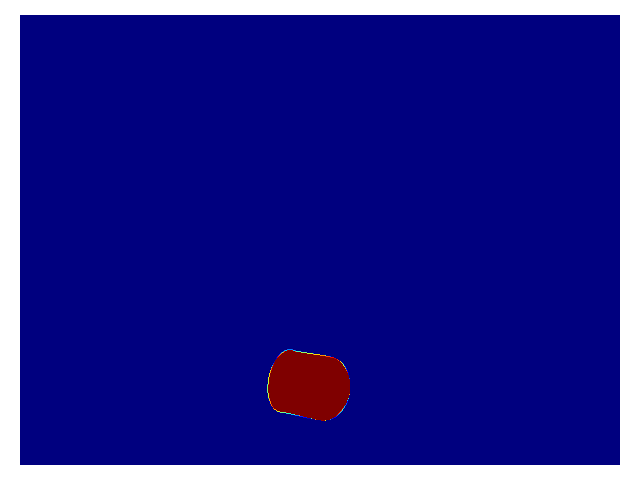
When saving the render, we have the option to not only store the color image, but also depth (distance of each pixel from the camera), pixel perfect segmentation masks and surface normals (the direction a surface is facing relative to the camera position) and some more.
Having generated our dataset, we now need to train a neural network with it. I’ll be using Facebooks Detectron2 framework and PyTorch as it offers high quality implementation of state-of-the-art algorithms like Mask R-CNN and I’ve been working quite a bit with it lately. You can of course try something less old school like the Detection Transformer if you feel adventurous.
As always you can find the Jupyter notebook with all the code required for each blog post in the notebooks directory of the blogs GitHub repository. You can also try it out directly using ![]() .
.
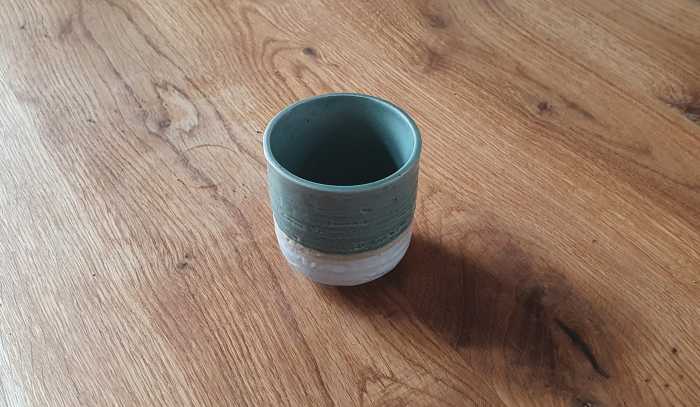
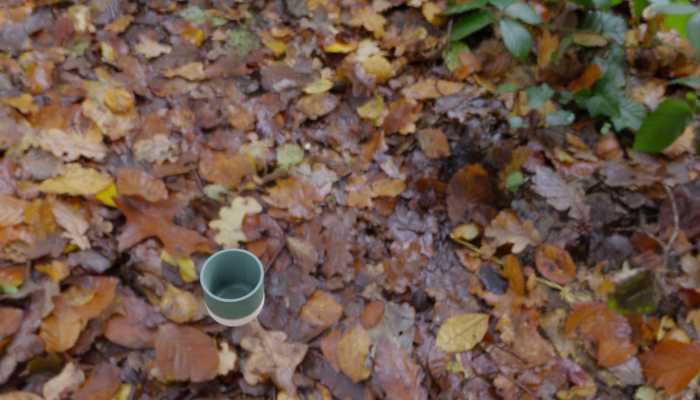
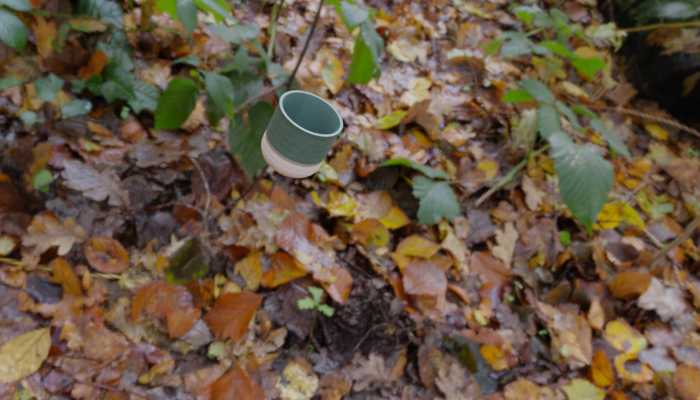
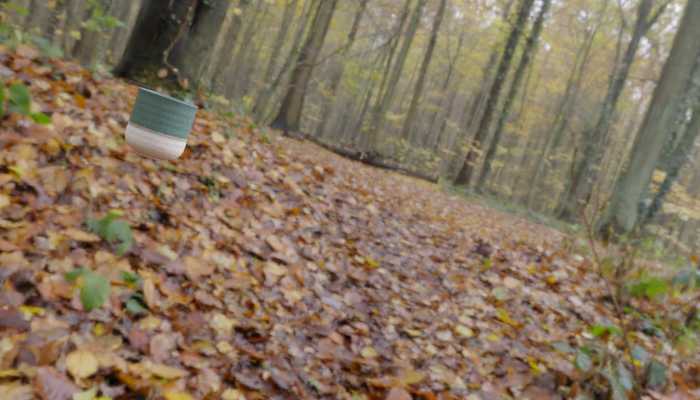
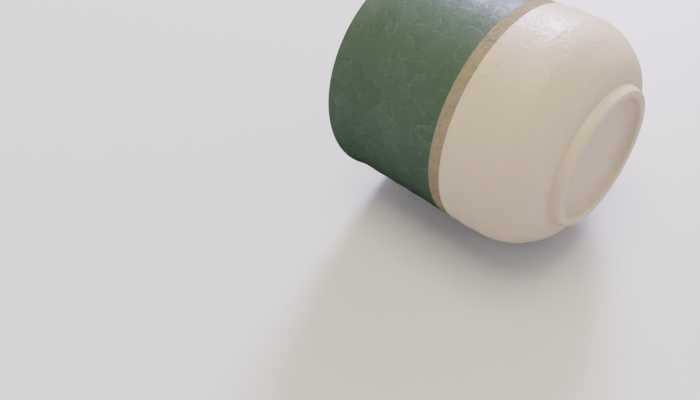
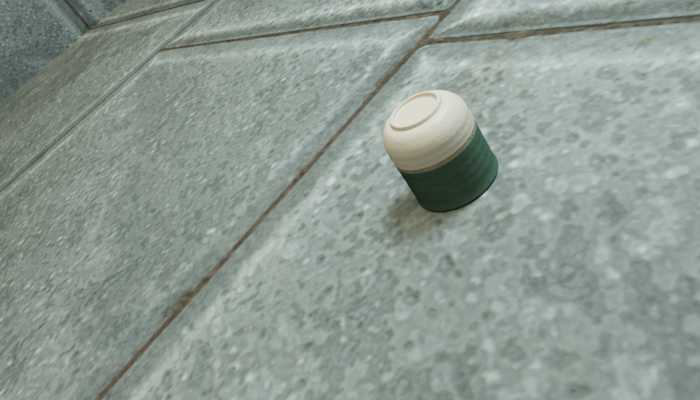
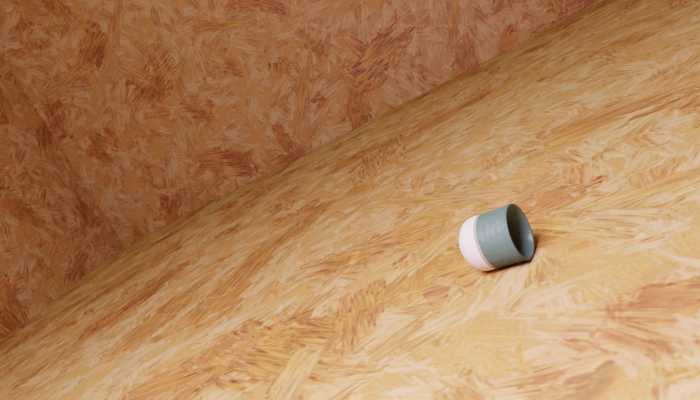
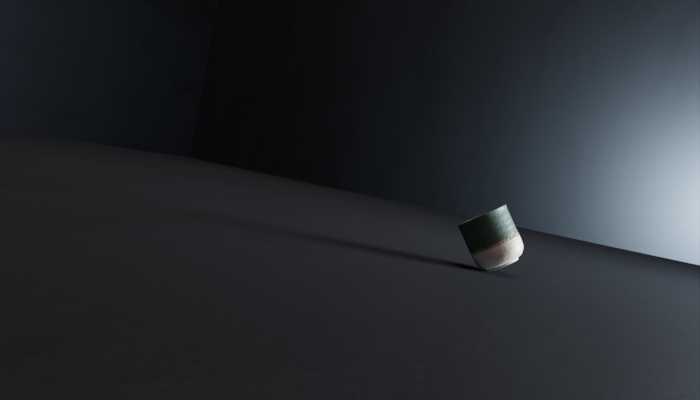
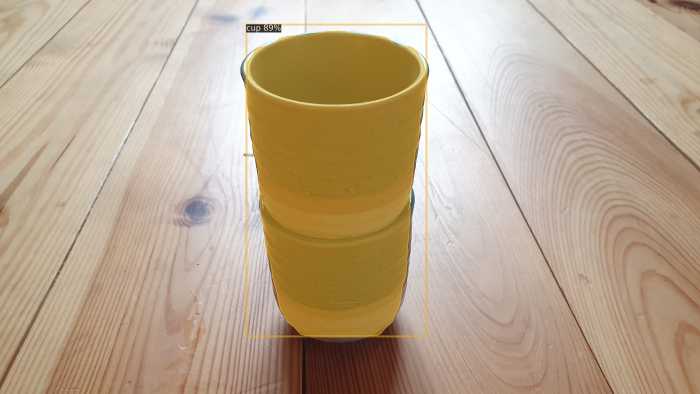
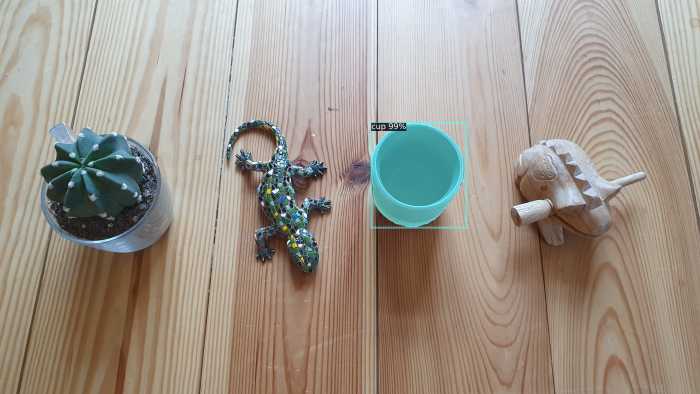
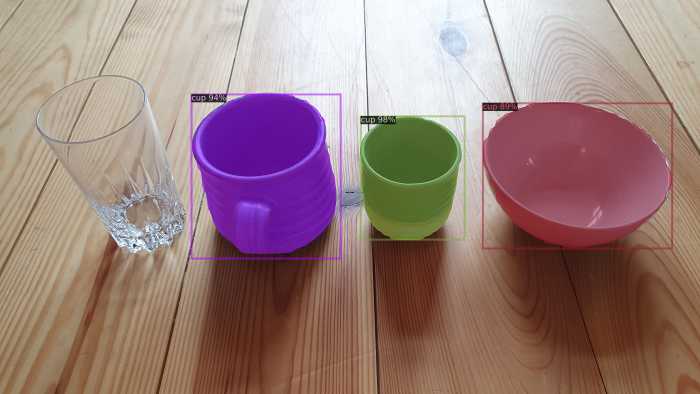
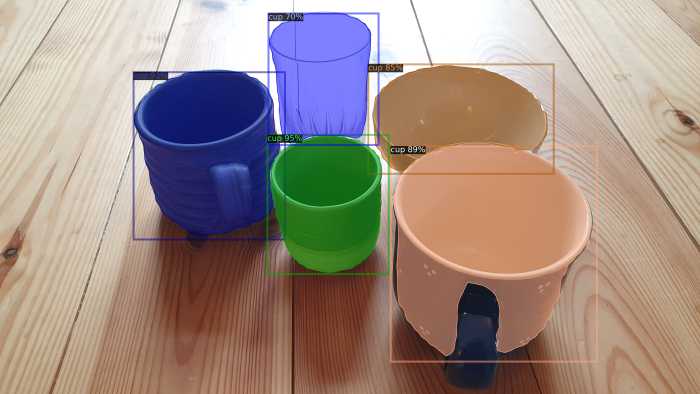
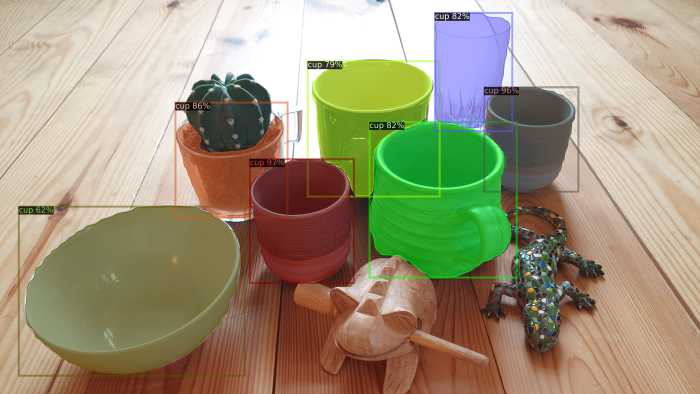
Training takes only a couple of minutes on this small dataset (though longer training might further improve the results). Once the network is trained on our photorealistic, prefectly annotated training data, we can try to evaluate it on real world images (and videos) taken with my smartphone. Let’s start with the one from the very beginning of this article:


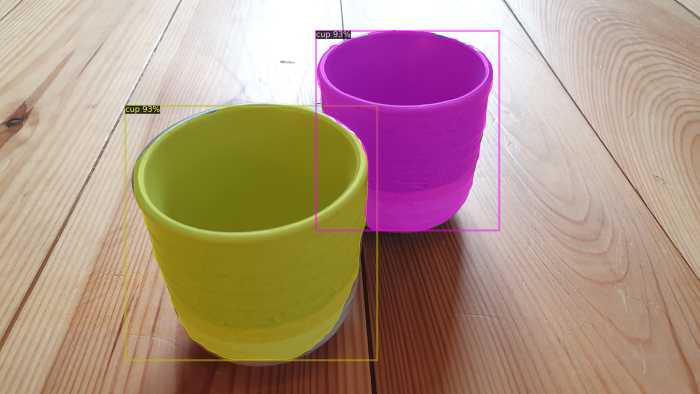


This almost concludes our little journey into synthetic worlds. Before you move on have a look at the short video of me foolishly waving around a cup which gets segmented (mostly) correctly in real time. Happy rendering.
-
One way is to use a robotic arm to move each object into predefined, known poses and store the image together with the pose. This severely restricts the variety of backgrounds and lighting (an important point we will come to later) and the gripper of the robotic arm can occlude important parts of objects. ↩
-
At least in this artistic fashion and not using CAD software as is done in engineering. Depending on the kind and complexity of the model, using CAD software can be a better choice for modeling and you can usually export it in a format which can later be imported into Blender for the rest of the data generation pipeline. ↩
-
An objects pose consists of it’s rotation and translation. ↩
-
I’ve added the actual config files used to generate the renders for this article in the blogs GitHub repository under
data/cup/blenderproc. ↩